Removing a car dashboard is something to be done carefully and patiently without damaging the car’s inner parts, including its current circuit.
This article will guide you through the process. So here is how to remove dashboard.
Steps of removing car dashboard.
Following are the basic steps of removing the dashboard safely. So prefer it at least twice before you get into the action.
Overview.
- Remove the battery.
- Disconnect the dash harness’s internal wire harness connections.
- Disconnect the antenna wires and radio speakers.
- If you have a Package Tray, remove it.
- Disconnect the speedometer cord from the dash’s rear.
- Remove the heating control.
- Remove the dash assembly by unscrewing the bolts.
- Return the unit to its original position before exiting via the passenger door.
1st Step
When removing the dashboard, disconnect the negative battery wire from the car’s battery to avoid any electrical damage. Make sure the cable does not come into touch with any metal, which might result in sparks.
2nd Step
Remove the glove box from the dashboard by undoing the screws. Remove any bolts or clips that are keeping the glove box door shut. Remove all of the screws from the lowest portion of the dashboard and allow it to come free and fall to the floor.
3rd Step
Unplug the vehicle radio’s faceplate and remove the radio mount with a screwdriver. Remove the radio from the dashboard by unplugging the electrical cabling from the rear of the unit.
4th Step
With a screwdriver, remove all of the screws on the top area of the dashboard. You’ll also need to remove screws on the sides and below it to release the dashboard.
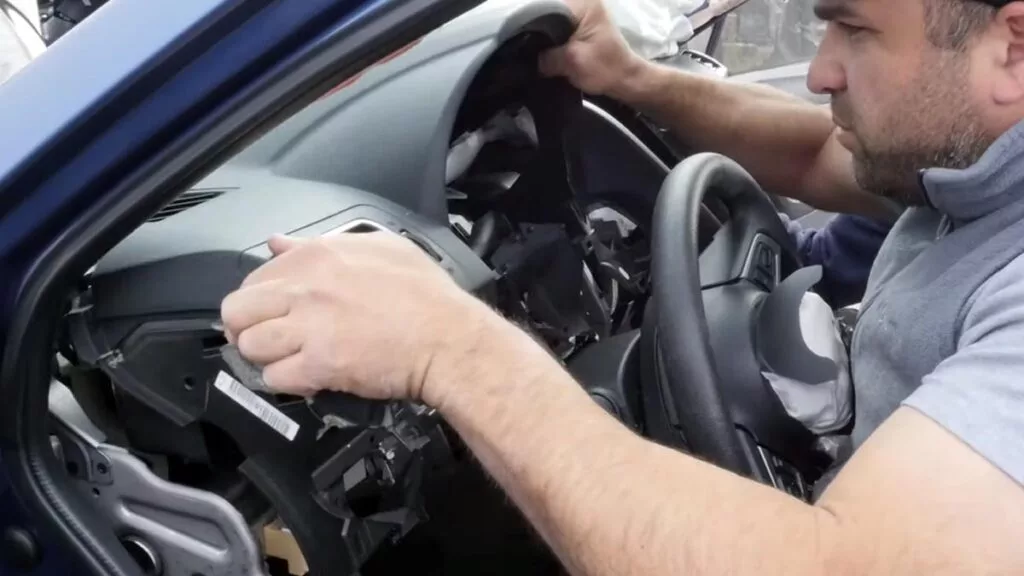
To get access to the rear of the dashboard, slide it forward. To unhook the electrical wiring for the gauges and other gadgets on the dashboard, you’ll have to go below it. Pull the top dashboard out and out of the car after you’ve removed all the wiring and connectors.
Maintenance and cleaning.
Now that you have the dash, it’s the best time to complete the following tasks:
- Heater hoses should be tightened (four clamps: three on one side, one on the other)
- Ensure that all of the dash lights are operational.
- Wipe the dust from the firewall, pedal box, heater box, and other surfaces.
- Wiper linkage should be lubricated. This is a system with Heim-joints and rose-joints. Simply apply as much general-purpose grease as you can and wipe away the excess.
- Align the defrost ducts in the dash. My gap was 1/8 inch. I obtained a much better seal by loosening, shifting, and retightening. Hopefully, the heater will now thaw and desiccate more effectively.
- Sanitize the heating ducts (if you feel like it).
- Ensure that the pedal shaft is lubricated.
- Ensure that the hood-opener is well lubricated (bonnet lever).
- Lubricate the heater lever assembly and cables with dry grease.
- Lubricate the pivot point of the accelerator pedal.
- Use a mild cleaning solution to clean the dash.
- Remove the dash pad and use vinyl/upholstery paint to refinish it.
Reinstalling the dashboard.
This is the most challenging aspect…
Replace the dash assembly via the passenger door:
- Place the dash assembly in the approximate region, then check that the heater levers are able to pass through the slots before adequately securing it to the three firewall brackets.
- Between the pedal box and the steering column brackets, the bottom of the dash fits.
- Putting the two bolts for the heating control back in was the most challenging aspect for me. A mirror is helpful since they are screwed in under the dash.
- It’s simpler if the radio is turned off. Remove the ashtray base (three screws) in any instance to get access to the lever assembly. Using a #1 Phillips (big screwdriver) to prevent stripping the bolt heads.
- Connect the wires.
- Loosely install the three dash-top machine screws.
- Tighten the dash-top screws after installing the right and left dash-to-A pillar bolts.
- The two 12mm-head steering column bolts should be replaced and tightened.
- Screw the speedometer cable into the rear of the housing from under the dash.
- Test the lights and ignition after reconnecting the battery.
How much does it cost to remove a dashboard from a car?
A dashboard replacement costs between $2,094 and $2,243 on average. Labor expenses are expected to range between $567 and $716, with components costing $1527. Taxes and fees are not included in the estimate.
If you do not have much money, you can still remove it on your own. But make sure you are doing it in the best way with safety. You can prefer this YouTube video for more assistance.
How can I get a new dashboard for my car?
- Before doing any automobile repairs, disconnect the battery.
- Remove the steering wheel, instrument cluster, glove box, air vents, and any other screws or panels from the dash.
- Slowly and gently remove the dashboard.
- Place the old dash on top of the new dash.
- Install the new dashboard in the vehicle.
How long does it take to take a dashboard down?
Most professionals can remove the dashboard; however, anybody with little vehicle repair knowledge could do it. The dashboard can be removed in roughly two hours, depending on your mechanical ability.
But when removing it on your own, do not try to be very fast because it may cause severe damage to your car’s interior. And also, make sure you are not breaking the knobs and not losing the screws because they may be hard to find in the shops.
Is it possible to replace a car’s dashboard?
It’s Simple to Replace Dashboard Lights. However, you may use similar disassembly techniques on practically any car. Before you begin the procedure, go to an auto parts shop and buy multiple packages of new bulbs (change all of the instrument cluster bulbs at the same time) and set aside approximately two hours to do it.
FAQs about how to remove dashboard.
Can you replace a car dashboard?
As previously said, if you have the time and money, you may modify almost any aspect of your car’s interior, including the complete front dashboard and steering wheel. Naturally, replacing the whole dashboard will be costly since various separate components, and the new dashboard will be necessary.
How do you fix a broken dashboard?
Do dashboards still crack?
A cracked dashboard is less prevalent in modern automobiles, but it is still an issue in many older secondhand cars. While a cracked dashboard may be more of an aesthetic concern than a safety one, it may be rather inconvenient.
Hope you enjoy the article and get good idea about“ how to remove dashboard ”. If you have more matters regarding this comment below and we will give you more professional solutions. And if you like to know about Remove the panel under the steering wheel check this out.
